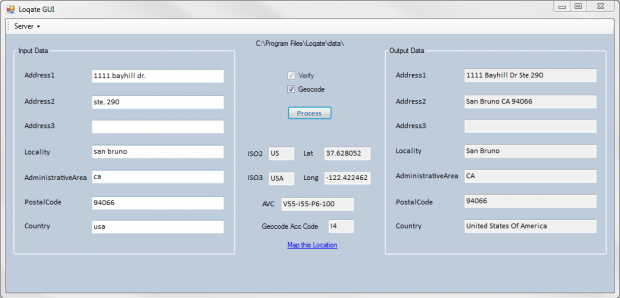
Creating a Simplified Verify Demo GUI in C# Using the Loqate .NET API
Overview
The tutorial provides step-by-step instructions showing developers how to create a simplified version of Loqate’s Verify Demo User Interface using the Loqate .NET API. The resulting GUI will demonstrate the Verify and Geocode functionality. The GUI also allows for the user to set the Global Knowledge Repository (GKR) location.
Requirements
Tutorial C# Source Code
The sample source code files required to run this tutorial are available for download at the link below.
Zip file contents:
- Properties folder
- Form1.cs
- Form1.Designer.cs
- Form1.resx
- LoqateGUI.csproj
- Program.cs
Software
The following software is required to complete this tutorial:
- Loqate Local API
- Microsoft Visual Studio 2005
Creating a New Project in Microsoft Visual Studio 2005
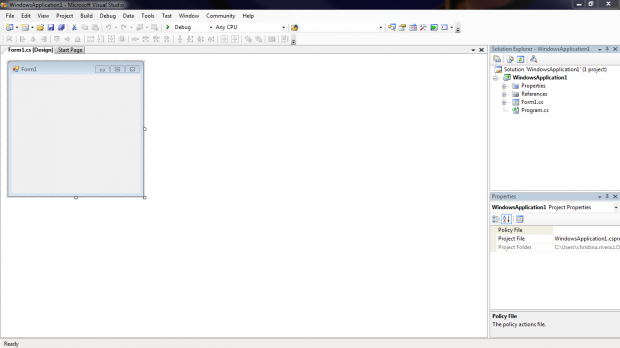
Although we have created the actual solution for the GUI for you. You will still need to create a new project. Select File > New > Project. The New Project wizard will open. Highlight “Windows” under the Visual C# node on the left under Project Types and “Windows Application” under Templates on the right. Enter the name for your project in the Name field and select OK (this will automatically populate the Solution name with the same name). For this example, we will use “WindowsApplication1.” The Form1.cs [Design] tab will open and you will see the following blank Form1.
Adding the Source Code Files
Now we will add the sample source files in the zip file you have downloaded. Click on the Project tab and select “Add Existing Item…” Browse to the directory where you downloaded the zip file. Select and highlight all the contents from the zip file (while holding down the Ctrl button): Properties folder, Form1.cs, Form1.Designer.cs, Form1.resx and Program.cs. Hit the Add button.
A dialog window will pop up asking if you want to replace the existing file with the same name as shown below. Check the “Apply to all items” box and select Yes. Another dialog window will then open asking if you want to reload the file which has been modified outside of the source editor. Select “Yes to All.”
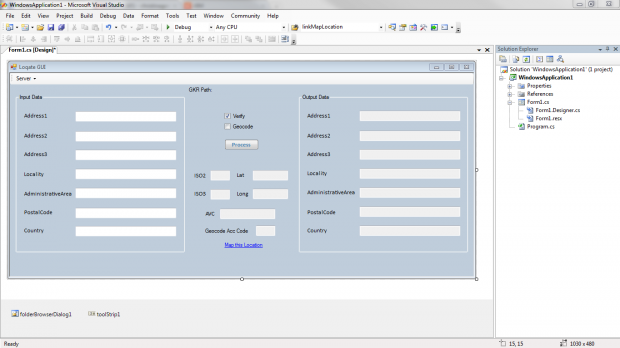
The GUI form will now appear as shown below.
Configuration
Before we dive into the details and functionality of the form components, let’s make sure everything is configured properly to build and run your solution. Select the Solutions Configuration pull-down menu and select Configuration Manager. The Configuration Manager window will open. It may have “Debug” selected as the “Active solution configuration” by default, which you may leave. To the right of it, in the “Active solution platform” pull-down menu, select <New…>. The New Solution Platform window will open. Select x86 or x64 in the New platform drop-down menu, depending if you have 32-bit or 64-bit. You can leave the default option, “Any CPU” selected for the Copy settings from options and leave the “Create new project platforms” box checked and hit OK. Hit the Close button of the Configuration Manager window.
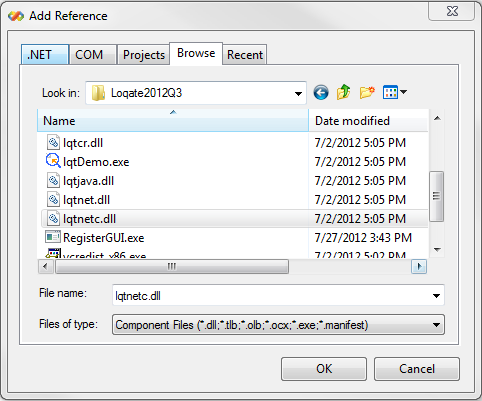
Next, let’s add the necessary DLL (digital link library) as a reference in order for your solution to run. You will need the lqtnetc.dll – the DLL through which the .NET API is referenced.
To add this, highlight and right-click the “WindowsApplication1” project in the Solution Explorer window. Select “Add Reference…” The Add Reference window will open. Select the Browse tab and browse to the directory where your Loqate software is installed. Select the lqtnetc.dll file and select OK as seen below.
Additionally, if you haven’t done so already, please make sure your Loqate installation directory and Loqate data directory are added to the PATH User and System variables in your Windows Environment.
Now that everything is properly configured, we can now go to the fun part of the tutorial! On to the GUI Form…
The GUI
The Form
Here is an overview of the components of the actual GUI Form (Form1.cs [Design]) as seen below. It has the Input Data on the left and the Output Data on the right, both in a GroupBox. Additional output fields for the ISO 3166-1 alpha-2 and alpha-3 country codes, Latitude/Longitude and accuracy codes for Verification and Geocode are also displayed.
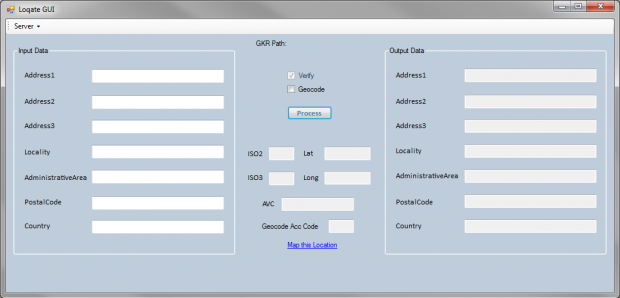
If you notice, the Verify checkbox is always checked by default since it is required to run the Verify and/or Geocode process whereas the Geocode checkbox is optional.
At the upper left-hand corner, you will see a Server pull-down. This allows for you to set the GKR location which will be displayed in the text field, “GKR Path:” upon selection.
The “Map this Location” link is available for users to see the location of the address based on the geocode generated after processing the input.
The Code
We will now take a look at the code associated with the GUI Form. Go to File > Open > File… Select form1.cs and hit Open button. This will open the code for your GUI which uses some of the sample code in lqtSample.cs which is included with the Loqate Engine installation.
As you can see, most of the work is in the “btnProcess_Click” method:
- Loqate objects defined
- GKR path is checked
- Loqate server initialized
- Process list created
- Loqate session opened
- Input values retrieved, records processed and results outputted
- Latitude/Longitude checked to map location
- Loqate session closed
- Process list destroyed
- Loqate server shut down
The other two methods, “linkMapLocation_LinkClicked” and “toolStripMenuItem1_Click” allow the user to map the geocoded location and set the GKR path, respectively.
Building and Running the Solution
Build Solution
Select Build > Build Solution. In the Output window at the bottom, you will see if there are any compilation errors. If the build succeeded, take note of the folder from the Output window where your executable is located in. Browse to that folder and copy the WindowsApplication1.exe file to where your Loqate installation is. Once that is done, you may launch the .exe file from there.
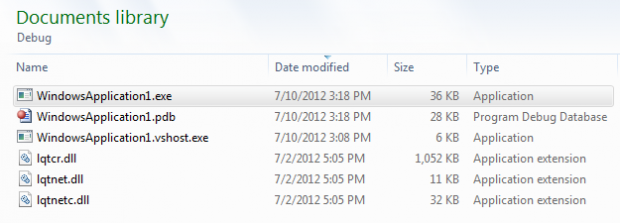
Run the GUI
Once you launch your WindowsApplication1.exe file, you will see the GUI come up. Go ahead and check the Geocode box and fill in the input fields with our Loqate Office address. If you hit the Process button before specifying your GKR location, it will prompt you to select your path as shown below. Otherwise, you can go ahead and specify the GKR location first by clicking on the Server drop-down menu in the upper left-hand corner before filling out the input fields and clicking the Process button.
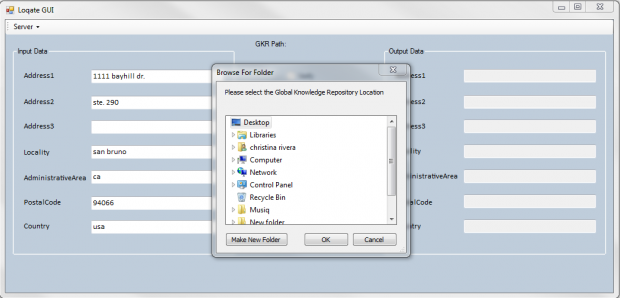
Once you hit the Process button, your GUI should return the following output displayed below. Go ahead and click on the “Map this Location” link where you can see that it mapped the Loqate office based on the geocode generated. Congratulations, you have just successfully created and run a simplified GUI in C# which demonstrates Loqate’s Verification and Geocode functionality!
